

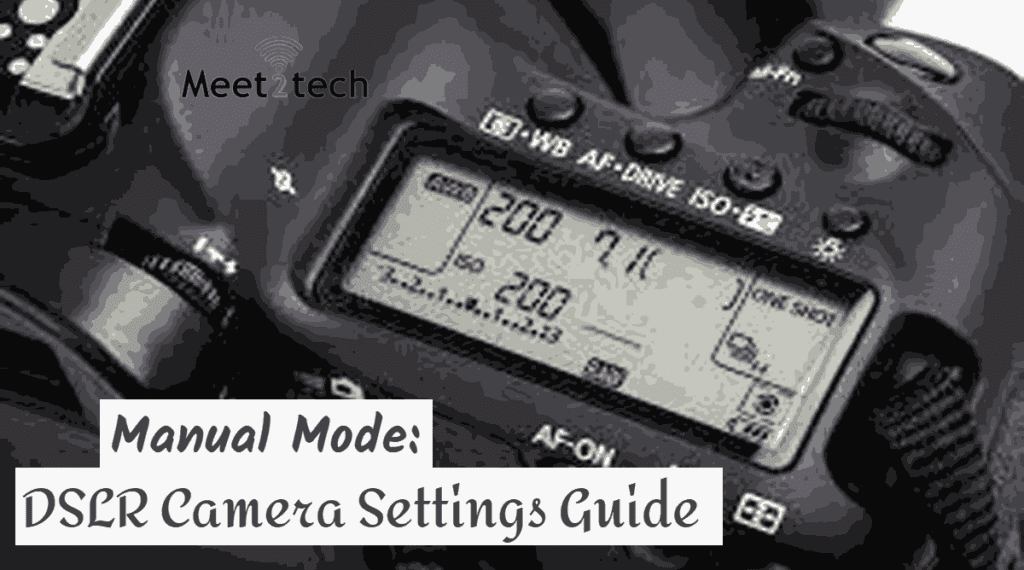
Manual Mode: DSLR Camera Settings Guide
Using a DSLR camera in manual mode allows you to have full control over your camera’s settings to create the exact image you want. Here are the key settings and how to adjust them:
1. Shutter Speed (Exposure Time)

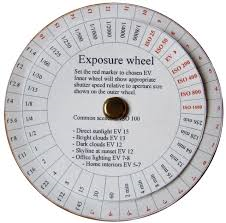
- Description: Determines how long the camera’s sensor is exposed to light.
- Control: Faster shutter speeds (e.g., 1/1000 second) freeze motion, while slower shutter speeds (e.g., 1/30 second) create motion blur.
- Adjustment: Typically adjusted using a dial on the camera.
2. Aperture (f-stop)

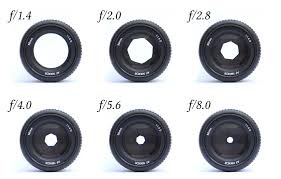
- Description: Controls the size of the lens opening, affecting the amount of light entering the camera and the depth of field.
- Control: Lower f-numbers (e.g., f/2.8) create a shallow depth of field (blurry background), while higher f-numbers (e.g., f/16) create a deep depth of field (sharp background).
- Adjustment: Usually adjusted using a dial or ring on the lens.
3. ISO Sensitivity

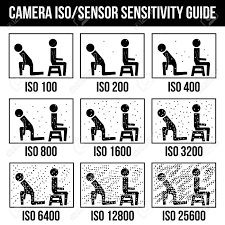
- Description: Determines the camera sensor’s sensitivity to light.
- Control: Lower ISO values (e.g., 100) are used in bright conditions to minimize noise, while higher ISO values (e.g., 1600) are used in low light but can introduce noise.
- Adjustment: Adjusted in the camera’s menu or via a dedicated ISO button.
4. Focus Mode
- Description: Choose between manual focus and autofocus.
- Control: Manual focus is adjusted using the focus ring on the lens, while autofocus is controlled by the camera.
- Adjustment: Switch between manual and autofocus using a switch on the lens or camera body.
5. White Balance
- Description: Adjusts the color temperature of the image to match the lighting conditions.
- Control: Options typically include Auto, Daylight, Cloudy, Tungsten, Fluorescent, etc.
- Adjustment: Set in the camera’s menu.
6. Metering Mode
- Description: Determines how the camera measures the light in the scene.
- Control: Common modes include Evaluative/Matrix, Center-weighted, and Spot metering.
- Adjustment: Set in the camera’s menu.
7. Exposure Compensation
- Description: Adjusts the exposure level set by the camera’s metering system.
- Control: Positive values make the image brighter, while negative values make it darker.
- Adjustment: Usually adjusted using a dedicated button and dial.
Steps to Set Up Your DSLR in Manual Mode:
- Switch to Manual Mode:
- Turn the mode dial on your DSLR to “M” for manual.
- Set the ISO:
- Determine the lighting conditions and set the ISO accordingly (e.g., ISO 100 for bright sunlight, ISO 800 for indoor or low light).
- Set the Aperture:
- Choose the desired f-stop based on the depth of field you want (e.g., f/2.8 for a blurry background, f/11 for more detail in the background).
- Set the Shutter Speed:
- Adjust the shutter speed to control the exposure time (e.g., 1/250 for general photography, slower for low light).
- Adjust the Focus:
- Use autofocus or manually adjust the focus ring to get a sharp image.
- Adjust White Balance:
- Set the white balance according to the lighting conditions (e.g., Daylight, Tungsten, Fluorescent).
- Check Metering and Exposure Compensation:
- Ensure proper exposure by checking the metering and adjusting exposure compensation if necessary.
- Take a Test Shot:
- Capture a test image and review it on the camera’s display. Check for proper exposure, focus, and white balance.
- Adjust as Needed:
- Fine-tune your settings based on the test shot results.
Tips for Manual Mode:
- Practice: Familiarize yourself with the controls and practice in different lighting conditions.
- Use a Tripod: For long exposures or low-light conditions, use a tripod to avoid camera shake.
- Histogram: Use the camera’s histogram to check exposure accuracy.
- RAW Format: Shoot in RAW format to allow for more flexibility in post-processing.
By mastering these settings, you can take full creative control of your photography and achieve the desired results.